

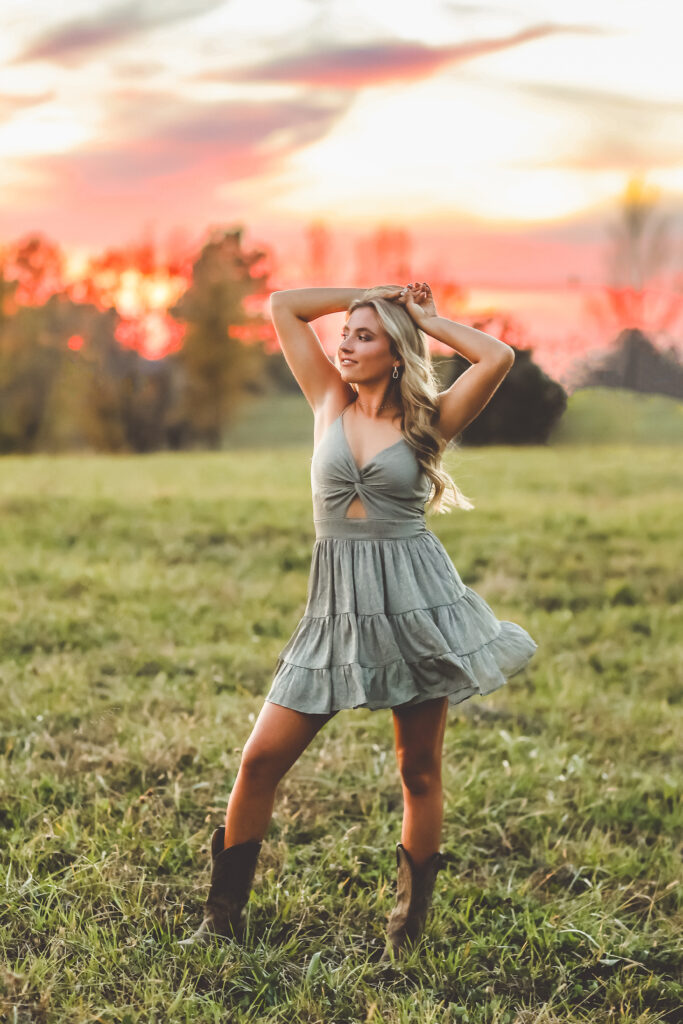
There is always one image from every session that I love. No matter who my client is, it’s so fun to find the one image that – even if it were the only one – it would be enough! For McKenna’s session, this is the image! Not only is she a beautiful girl, but it was a beautiful night with the most beautiful sunset.
However, I think what makes me love this image even more is that the before & after kind of wows me and makes me appreciate the end result even more!
Now let me first tell you that I am a realistic editor, if that makes sense. I mean that I don’t use Photoshop for fake skies; I rarely swap heads, and I don’t do any manipulation to images other than removing distractions and pimples/scratches! I strive to keep my images as true-to-life as possible, but with my own artistic touch.
So…having said that, I want to show you this image before it became the final product. Before I do that, though, I want to tell you that it was at the VERY END of her session and we almost missed the sunset because we were having too much fun at another spot on the farm! 🙂 When we got to this location, I knew that in order to keep the colors in the sky, I couldn’t make the image very bright. If you’ve been learning photography long enough, you know that when it’s dark, you will need to try to get as much light into your image as possible in order to brighten it up! However, if I had brightened it to make her face & skin as bright as it needed, then it would’ve also brightened the sky way too much, and I would’ve lost all the color & detail. I had to make a creative decision to completely UNDEREXPOSE the image (or keep it dark) knowing that I would brighten it up in my editing program, Lightroom Classic. Without further ado, here ya go…
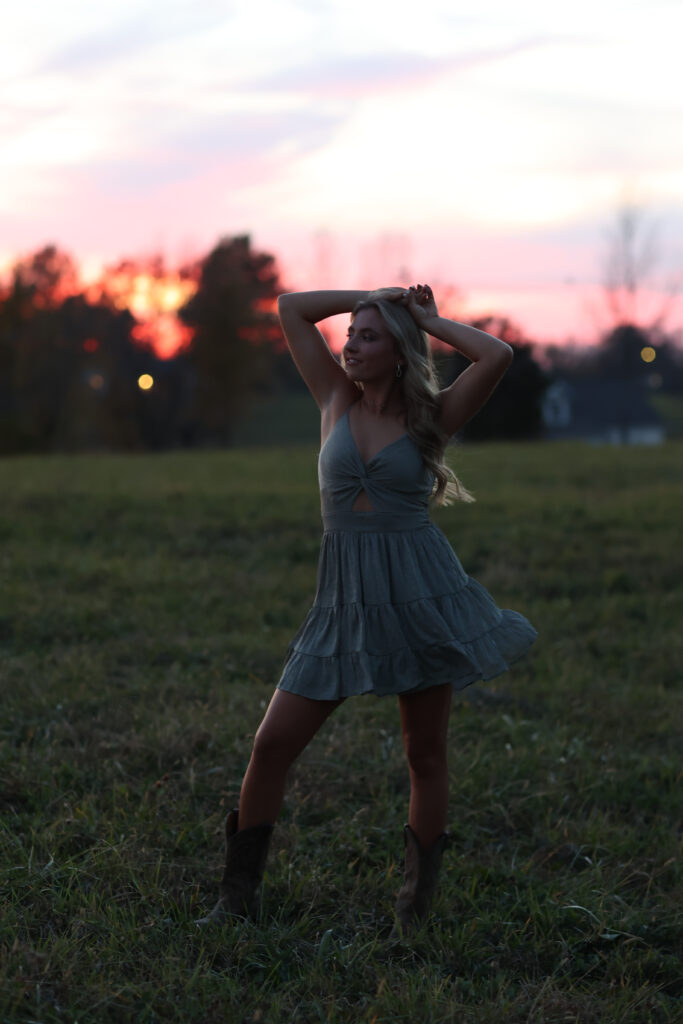
Are you gasping right now?!! LOL!! I warned you! 🙂 Okay, let me walk through what my settings were for this image straight out of camera.
Camera: Canon R6
Lens: 85mm f/1.2 L
Settings: Aperture – f/2.5 (low to let more light in; probably should’ve lowered it even more) ISO – 2000 (needed more of a “light boost” since it was dark…could’ve probably gone higher) Shutter Speed – 1/100 sec. (I could get away with it being low since she was very still. It she had been moving, this would’ve needed to be higher to capture motion better.)
How I edited this image:
Step 1: Apply one of my signature presets to the image to give it a nice base edit. This raises the exposure, shadows and blacks. I always tweak the image a bit, depending on its individual needs. If you don’t use a base preset (or quick base edit), you can adjust the sliders in the Develop tab to edit all of the parts of the image to your liking.
Step 2: Click on the brush tool in Lightroom and choose “Select Sky”. Once the sky was selected, l lowered the highlights and raise the dehaze option. This brought out the color and details of the sky.
Step 3: I opened the image in Photoshop and used the “Spot Healing Brush Tool” to remove some of the distractions in the background, such as the yellow lights/circles and the roof of the neighbors’ house.
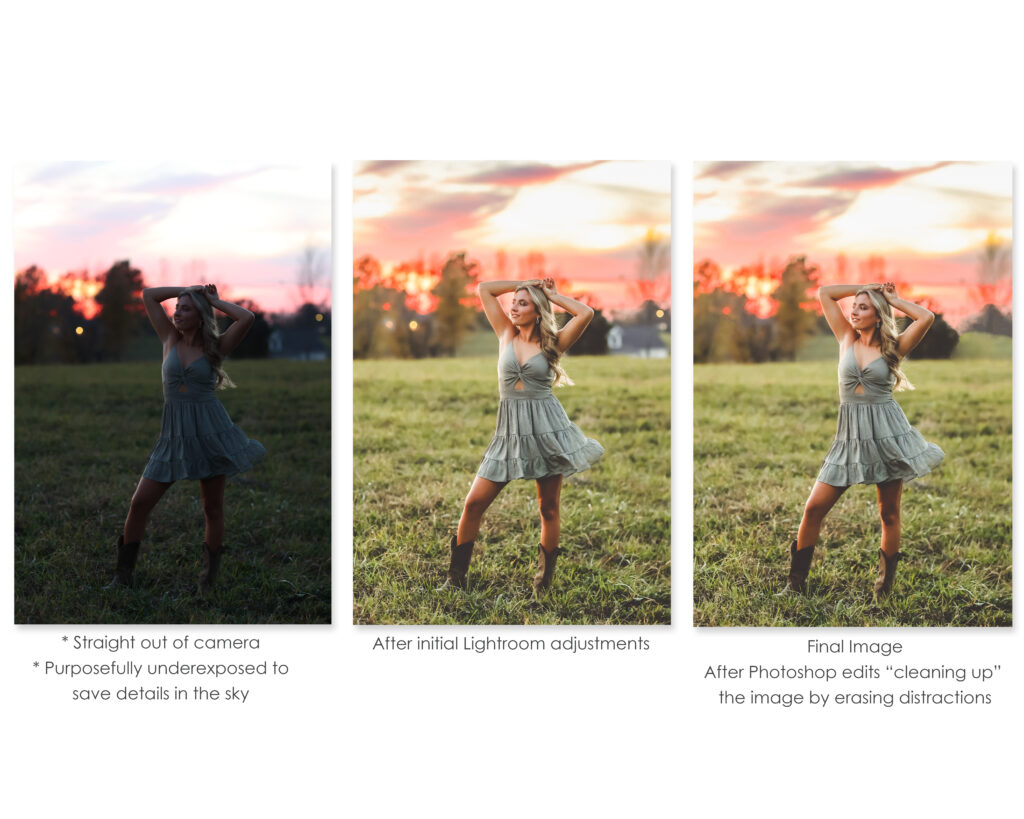
Here is the progression of the image.
What do I want you to get from this?
- Don’t be afraid to underexpose your image in order to save your sky details. You can adjust the different parts of the image in Lightroom. Also, if you accidentally underexpose an image on accident, don’t automatically throw it out! Lightroom is amazing and can most likely save your image!
- Sometimes cleaning up (erasing) little distractions in the image can make a big difference (like the lights in the background and the roof). Sometimes it isn’t necessary, but don’t be afraid to erase those distractions if it will make the image better (especially for simple portraits).
- Do I do all of these steps for all of my images??? Absolutely not!! But, it’s fun to see how one really great image can be transformed with a few simple steps if/when you need it to!
If you’re just getting started with photography and are looking to edit your photos, I can’t recommend Lightroom enough (and Photoshop, too, but Lightroom is where 98% of my work is done).
If you’re needing a cheerleader on your photography journey, I would love to be yours! Sometimes you just need someone to explain things and show you how to get from A to Z! I’d love to teach you! You can view coaching details HERE.
Thanks for being here, friend! 🙂


Be the first to comment